ActiCal allows your organization to easily collect payments for activities, whether through online methods like Swish and Stripe or via manual “offline” payments. This guide will help you set up and manage payments for your calendar.
1. Activating Payments for Your Organization
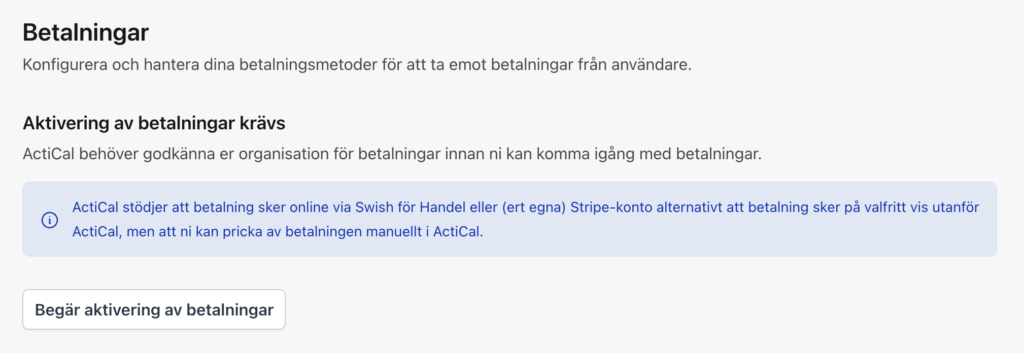
Before you can start receiving payments, your organization must be approved for payment processing by the ActiCal team.
- Navigate to Calendar Settings > Payments in Dashboard.
- If you haven’t started yet, click Request Activation of Payments.Note: Payments cannot be enabled while your calendar is in a trial period.
- Our team will contact you within a week to approve your organization.
2. Configuring Payment Methods
Once approved, you can configure your preferred payment providers.
Stripe (for Card and Google Pay) To accept credit cards and Google Pay, you need a Stripe account.
- In the Payments settings, find the Stripe Payments section.
- Enter your Stripe Secret Key (starts with
sk_live...) and Publishable Key (starts withpk_live...). - Save your settings.
Swish (for Sweden)
- Find the Swish Payments section.
- Enter your Swish number (payee alias).
- Ensure you have a “Swish for Handel” integration active with your bank.
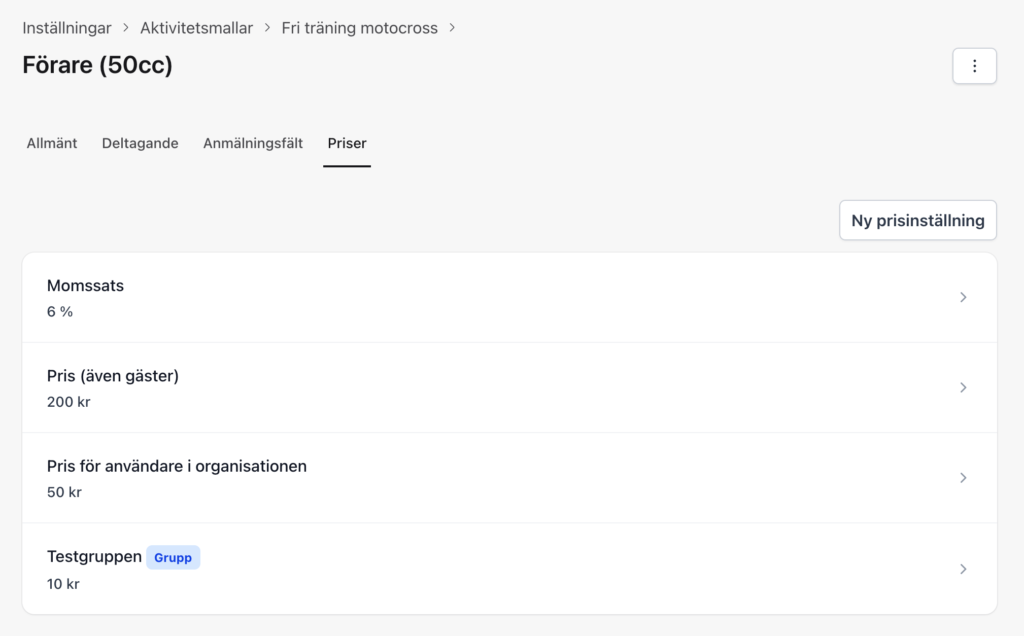
3. Setting Prices for Activities
You can define different prices for different roles within each activity (e.g., “Participant,” “Student,” “Member”).
- Open an Activity or Activity Template.
- Go to the Roles section and edit the role you want to add a price to.
- You can set multiple price types:
- Standard Price: The base price for everyone.
- Member Price: A discounted price for your organization’s members.
- Group Prices: Specific prices for members of certain groups (e.g., a “Youth” group).
How ActiCal calculates the price: When a user signs up, ActiCal automatically checks all applicable prices (Standard, Member, and Group prices) and selects the lowest price available to that specific user.
4. Managing Permissions
By default, only calendar owners can manage payments. However, you can grant this permission to other roles.
- Edit a Role in an activity or template.
- Find the setting Can handle payments for the activity.
- Toggle this to Yes to allow users in this role to see payment statuses, register manual payments, and issue refunds.
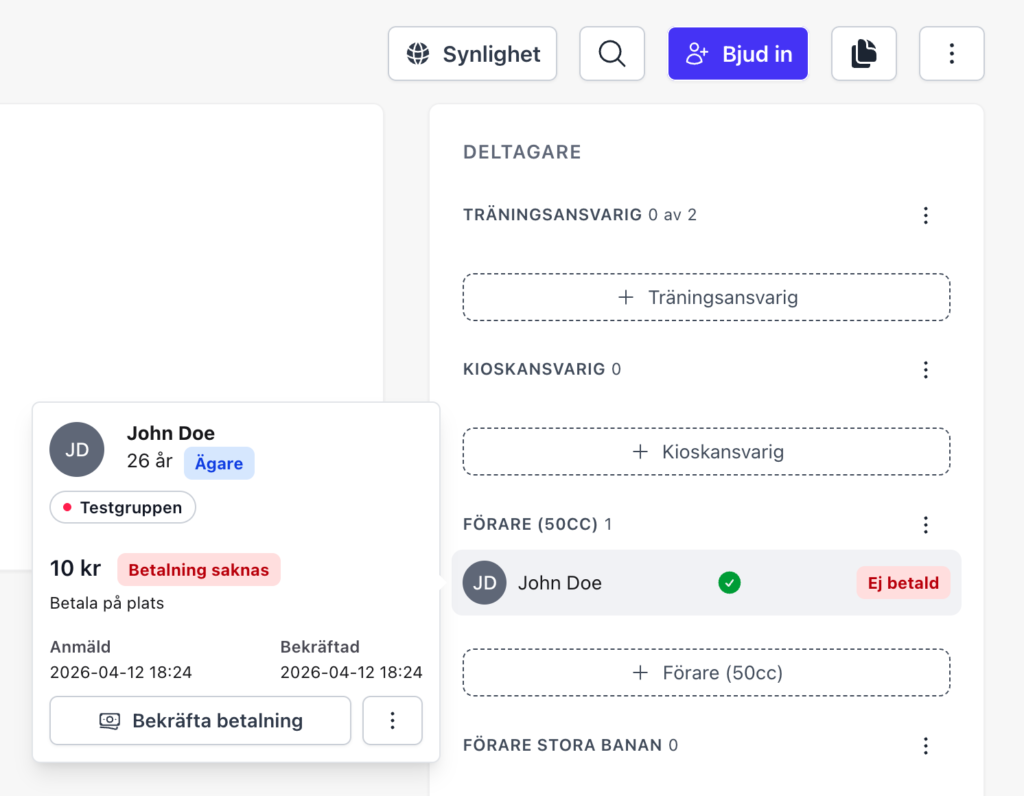
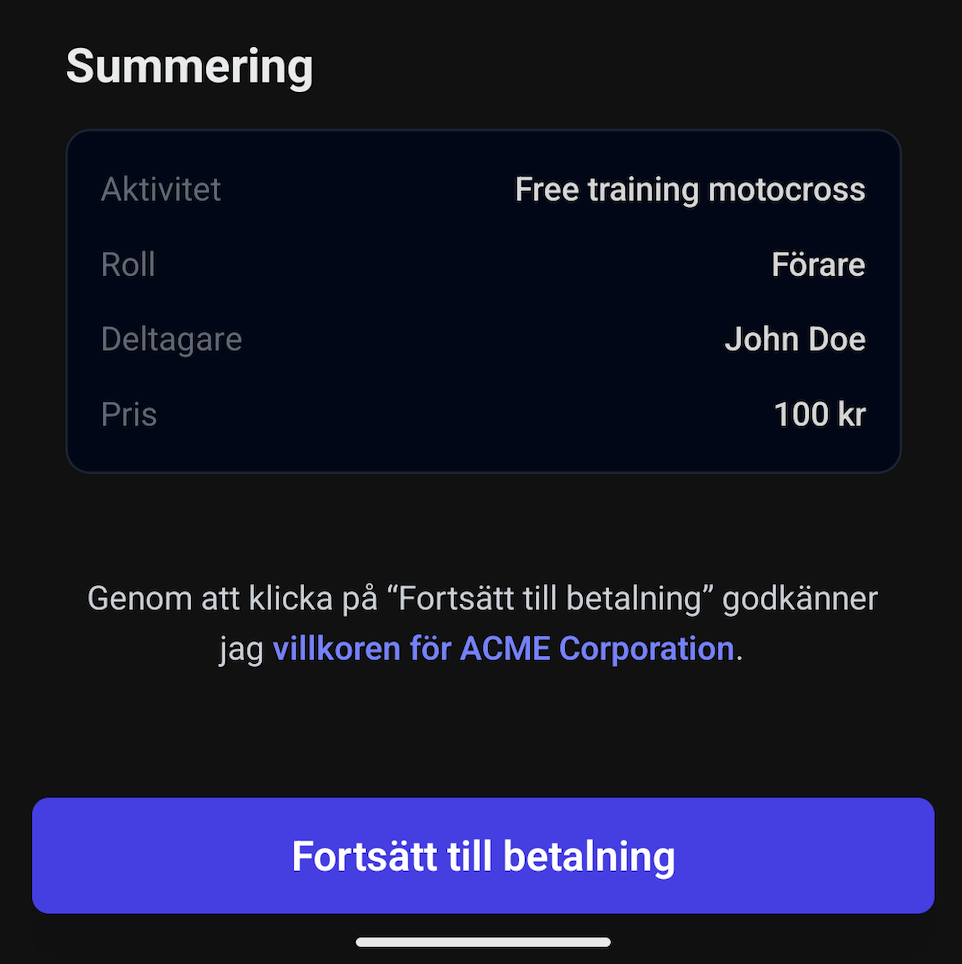
5. How Participants Pay
When a participant signs up for an activity that requires payment, they will see an “Ej betald” (Not paid) status in their app.
- Pay Now: Clicking this allows them to choose between Swish, Stripe, or Offline payment.
- Swish: Automatically opens the Swish app on their device.
- Stripe: Opens a secure payment sheet for card details or Google Pay.
- Offline: If they choose to pay outside the system (e.g., cash or bank transfer), they are instructed to contact an admin.
6. Admin Management: Registering Payments & Refunds
Admins can track the payment status of every participant in the activity’s participant list.
- Registering a Payment: If a participant pays you outside of ActiCal (e.g., cash), go to the participant’s profile and click Register Payment. This will mark them as “Paid” in the system.
- Issuing Refunds: For payments made via Stripe, admins can click Create a Refund to return the money directly to the participant’s original payment method.